
Hello and welcome! This is my very first post on my very first blog! Lifeofmaking.com is a blog centered around a broad range of craft tutorials. I’m so glad you are here!

These polymer clay crystals are so cute and super fun to make! I will show you how to create crystal points that fade from deep color to light translucent points. I hope you enjoy this photo based tutorial, and I hope you find it thorough and easy to follow. Let’s begin!
Knead and blend 1 part translucent polymer clay and 1 part color of your choice. Pictured, about ¼ of a standard block of polymer clay constitutes 1 “part.” Knead 2 parts translucent clay.
Here I am using Sculpey Premo- White Translucent and Peacock Blue.
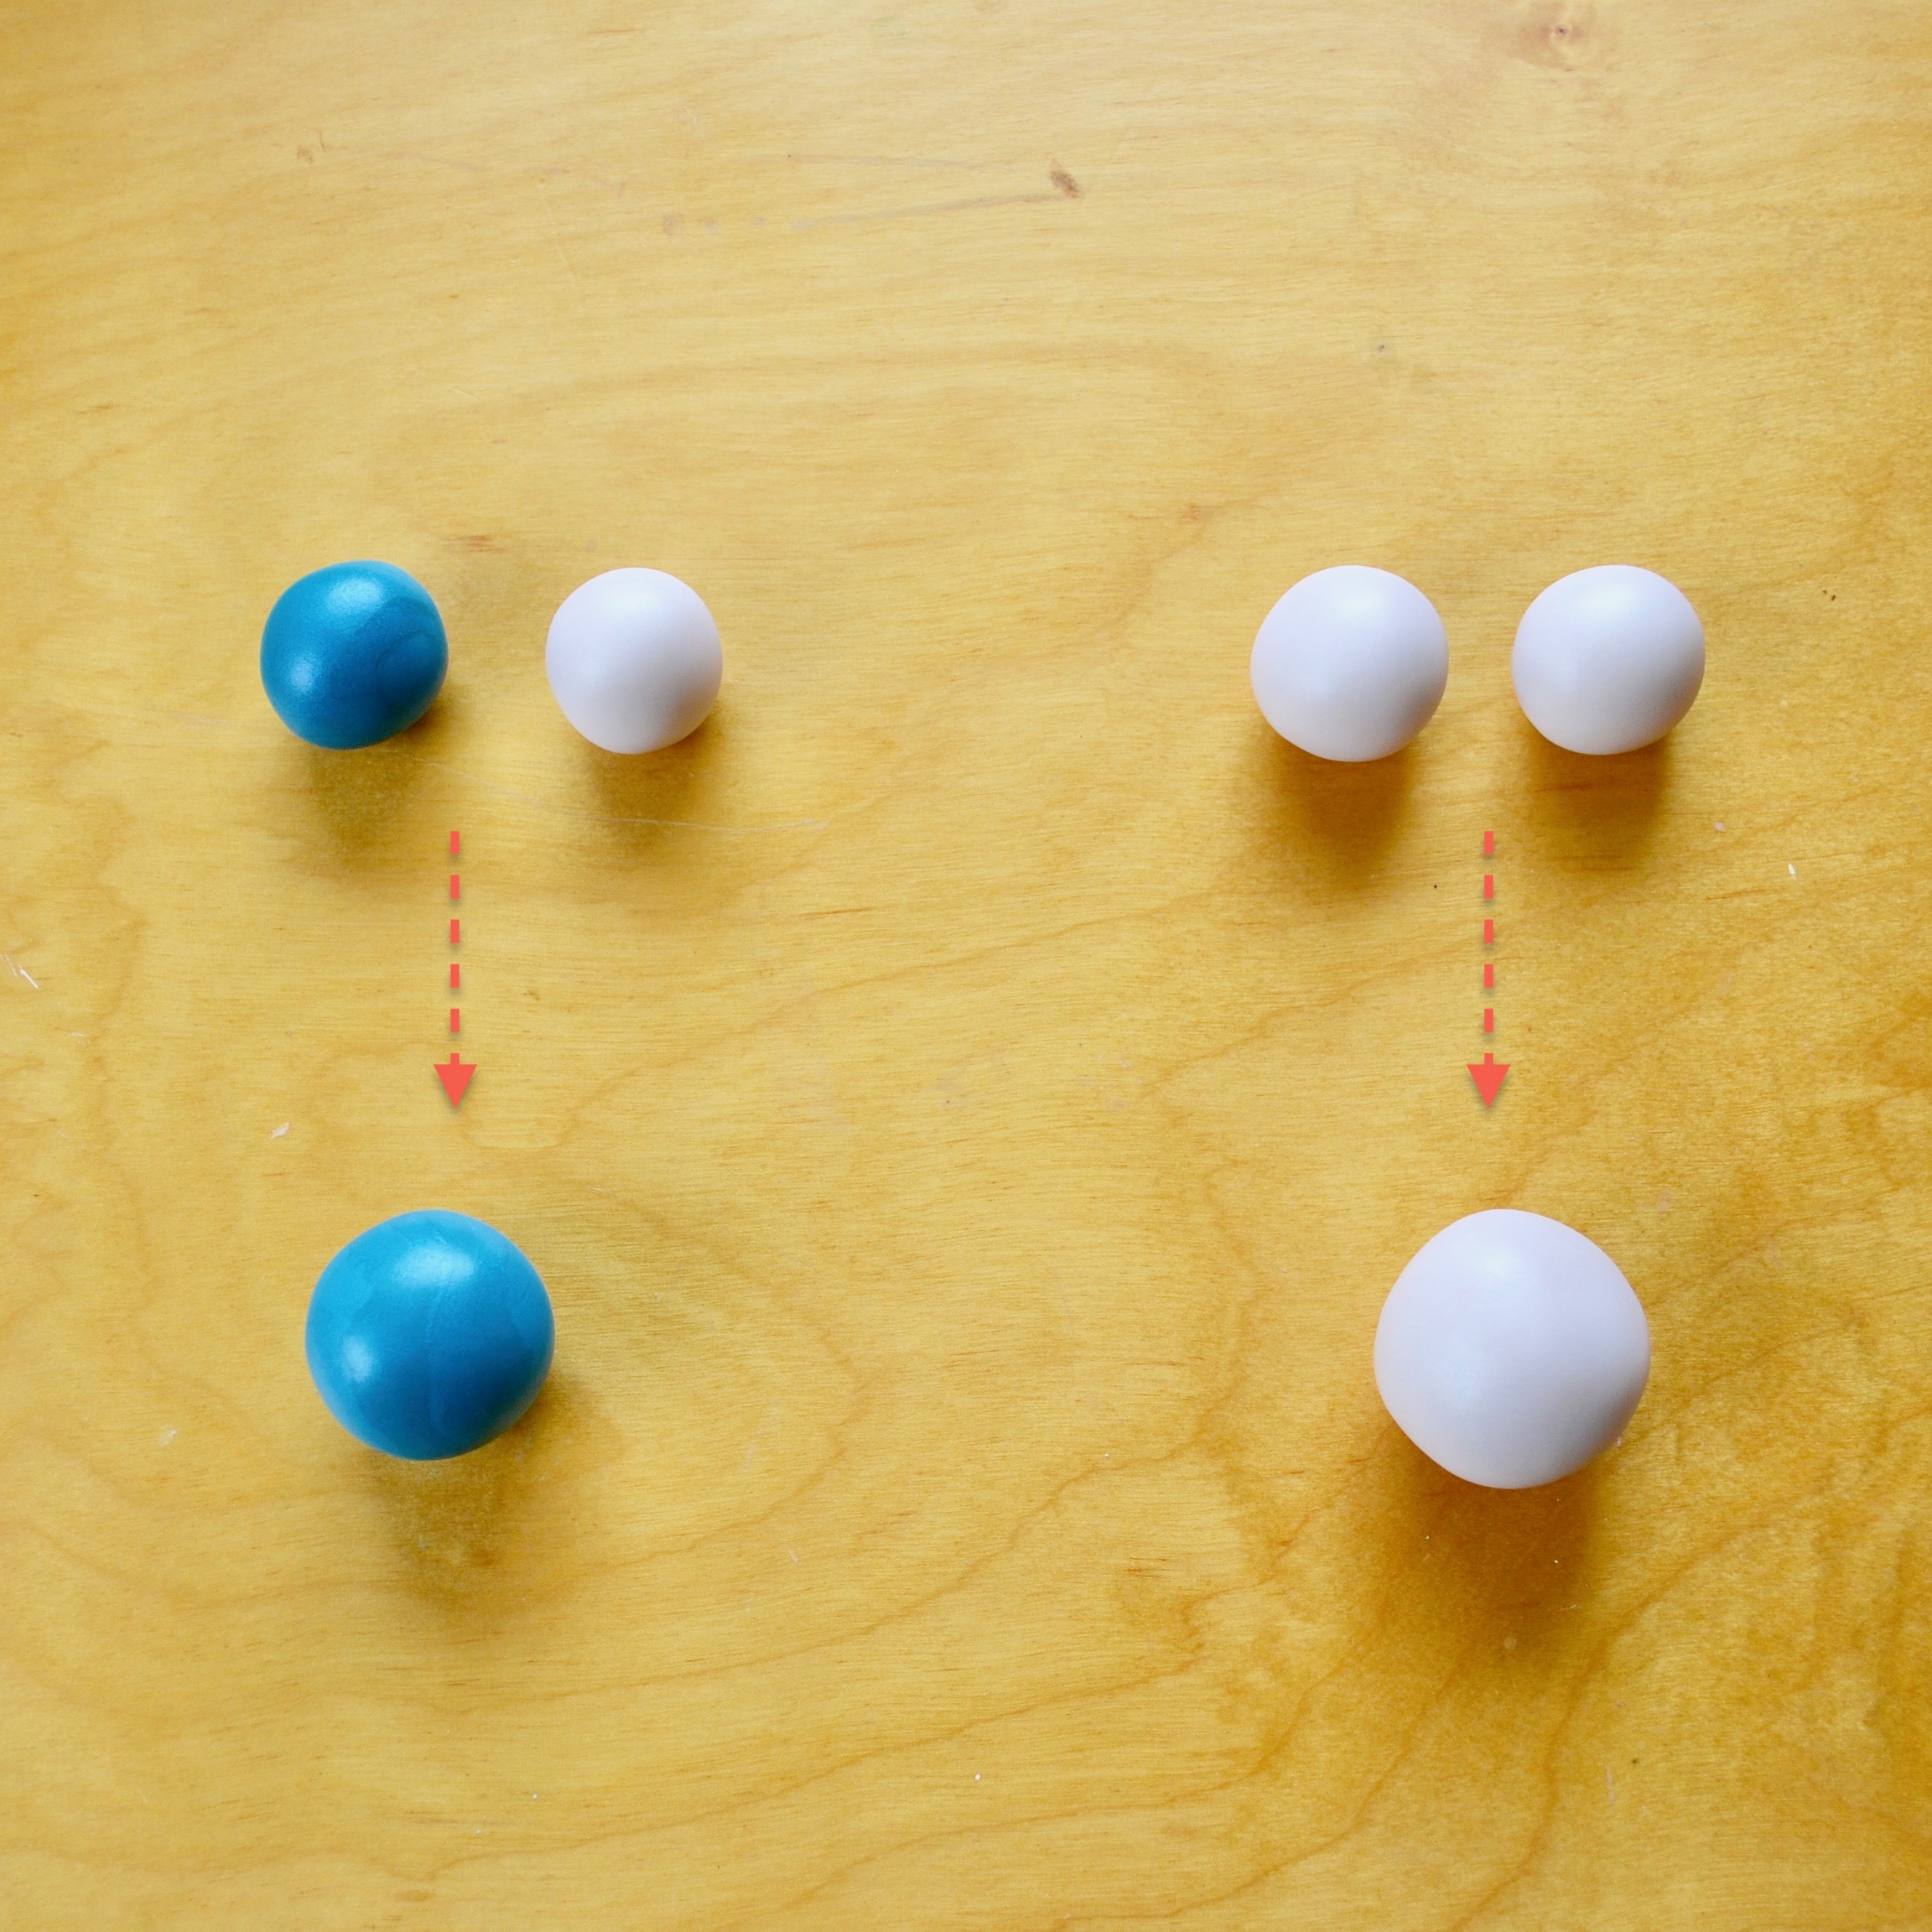
Roll both balls out in an elongated oval. Place 1 on top of the other. You may want to place a sheet of waxed paper between the layers at this point. Square off your stack into an elongated rectangle.

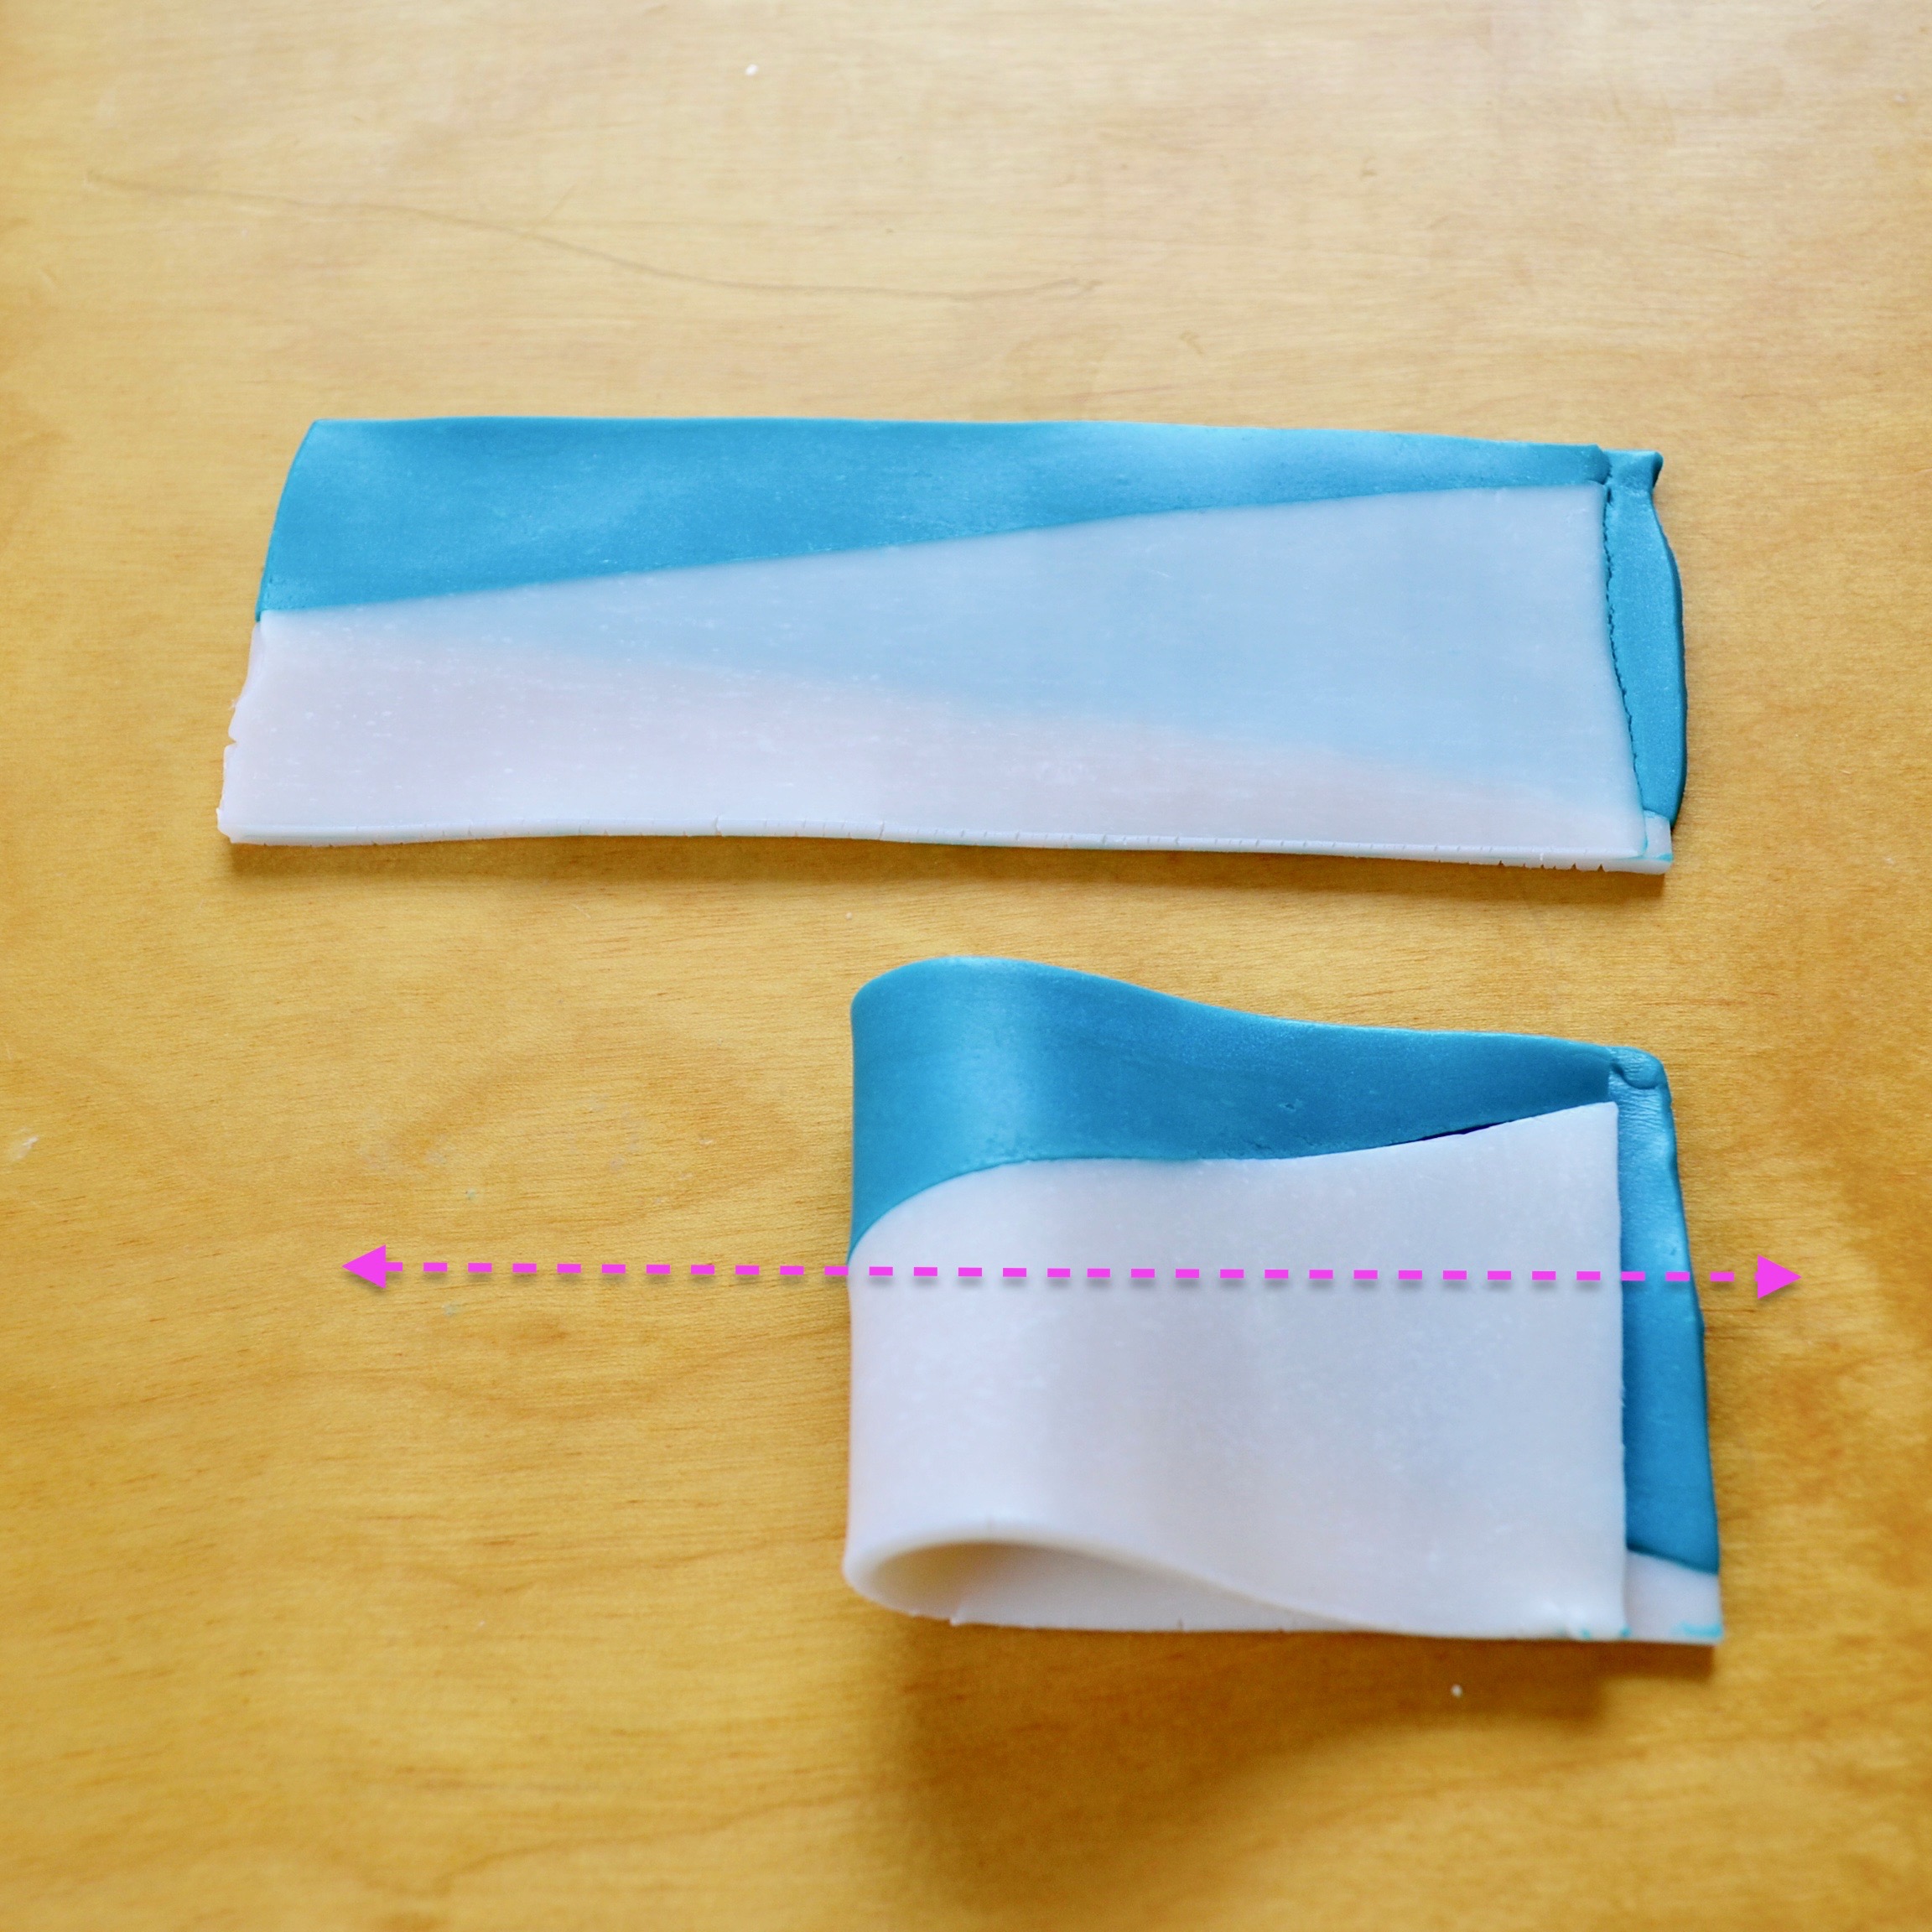
Cut your rectangle on the diagonal and separate the layers, creating 2 rectangles like the one shown (bottom).

We will now take this bi-colored rectangle to make a Skinner Blend. (There are many good tutorials that go into depth about this technique, and I am soon going to write my own soon). Fold rectangle over length-wise and feed through your pasta maker, or roll out. Fold over length-wise again and repeat the process several times, making sure you always fold the clay in the same direction.
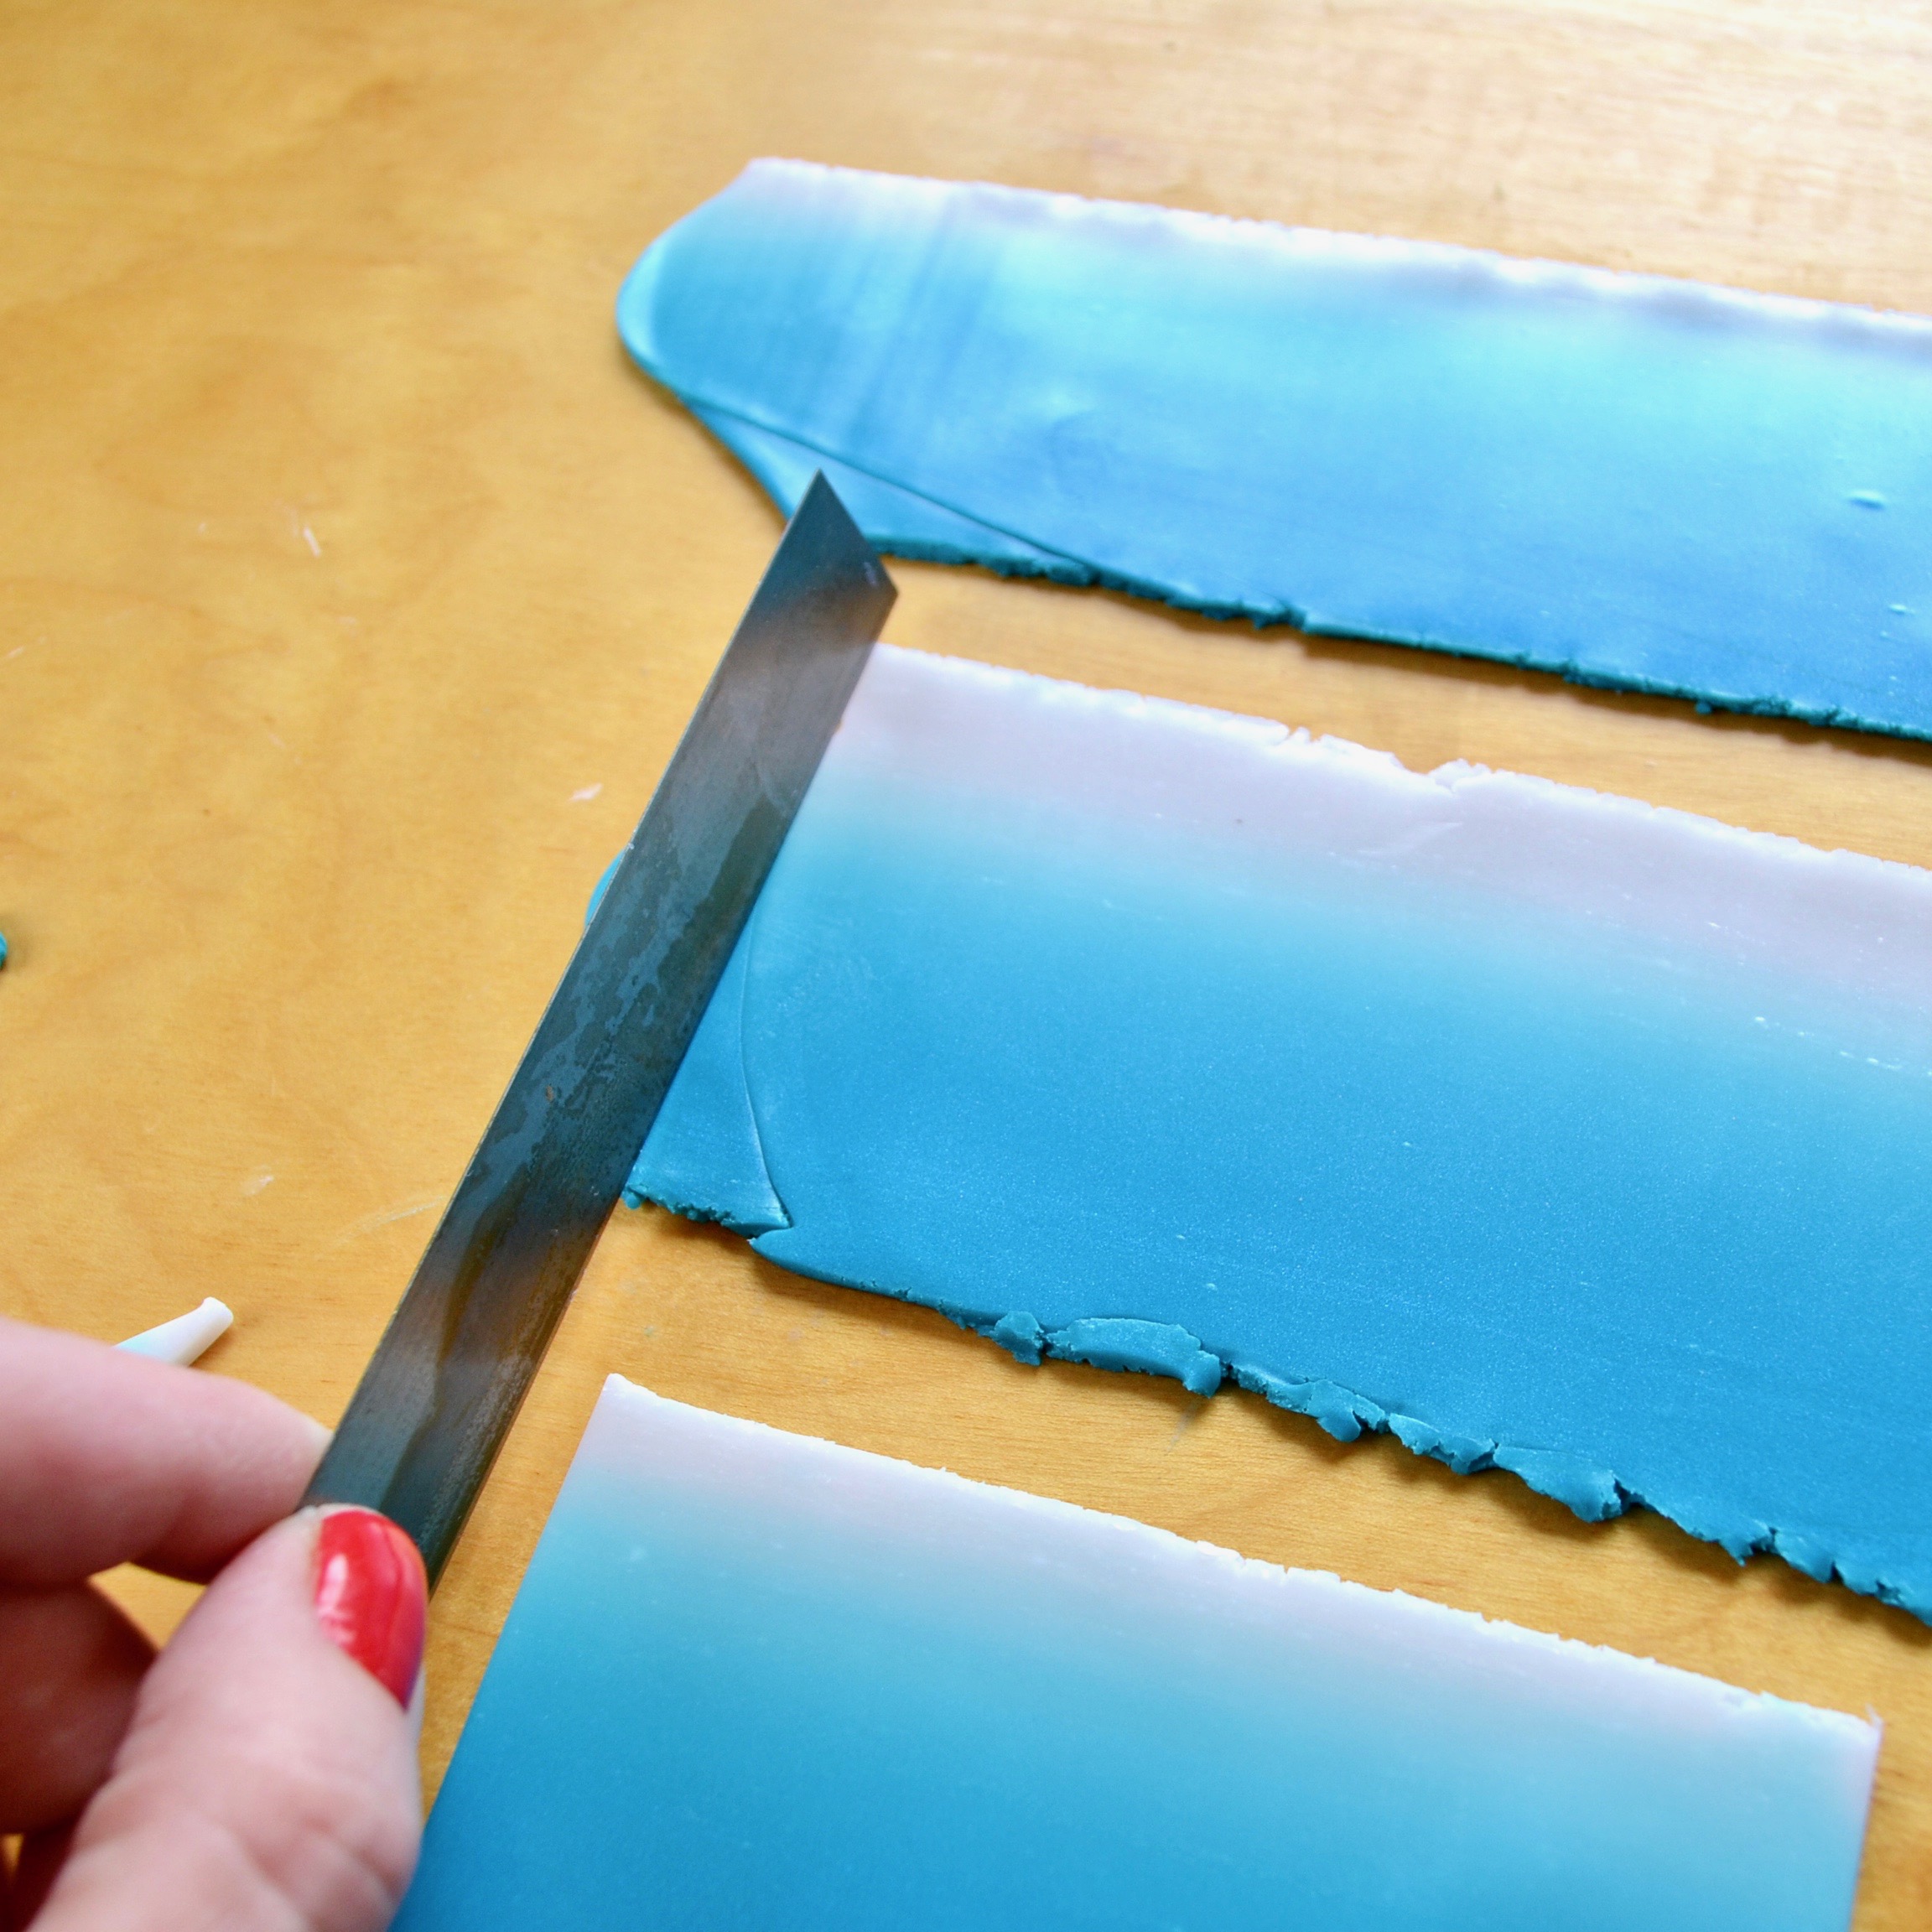
For our purposes, we want to keep a long thin shape. Often if you feed through your pasta machine, or roll it out with a roller, your Skinner Blend will widen out. To keep it from doing this- while you are feeding the clay into the pasta machine, place one side of the clay against the side. Take your pinky and place it up against the other side of the clay. Crank the clay through with your other hand, keeping your pinky in place. This will prevent the clay sheet from widening.

You should end up with some sheets of clay with a nice ombre effect, like this.

Square off your sheet of clay into an elongated rectangle. The size is not important. Make your rectangle as large as your clay sheet will allow, conserving the most of your ombre sheets of clay.
Starting from a short side of the rectangle, tightly roll it up into a cylinder. Go slow and press down gently from the center outwards as you roll to ensure that you are not trapping any air bubbles.

Here is a chance to modify the size of your cylinder (that will eventually become a crystal point). If it is too long, you can reduce its length by alternately compressing the ends and gently rolling it out. This will compress it without distorting it. If you want to lengthen it simply roll it out with even pressure. This will elongate it.

If you find yourself with a cylinder of clay that is simply too big, or you need more smaller sizes, you can cut one in half lengthwise. Then take each half and gently roll and shape it back into a cylinder. Compress to shorten if necessary.

Repeat the process of making the ombre cylinders until you have a nice variety of sizes to work with. For this project I ended up with cylinders ranging in size from 3/8” x 1.5” to ¾” x 2.5.”
Gently push or roll the sides of your cylinders into a more squared off shape (This step helps conserve a bit of the mass of the clay for the next step).

At this point, let the clay sit in a cool place for at least a few hours. This is important for the next step of cutting the cylinders. If you have worked the clay for a while it is warm and elastic. We need the clay to set and firm up a bit for the next step.
With a tissue blade or an X-Acto blade, cut straight down the sides of the cylinders, as shown, cutting down 4 sides.


Then cut down the sides again, as shown, cutting off the corners. You want to end up with an octagonal cross section, but it does not need to be perfect. Crystals in nature to on infinite shapes and sizes, and the variation in cut adds to the charm of these pieces.
TIP: When you are cutting, cut from top to bottom. Also I like to taper in a bit at the base. I cut at a slight inward angle, making the base of the crystal slightly smaller than the top.

Keep your shavings, we will use them later.

Lay the crystal on its side and cut the top end (light end) as shown. Rotate a quarter turn and cut again as shown.

Continue to cut more facets in the point. You can cut more than 8 side on the top and the sides. If one cut ends up not looking right go ahead and cut again at a slightly different angle.

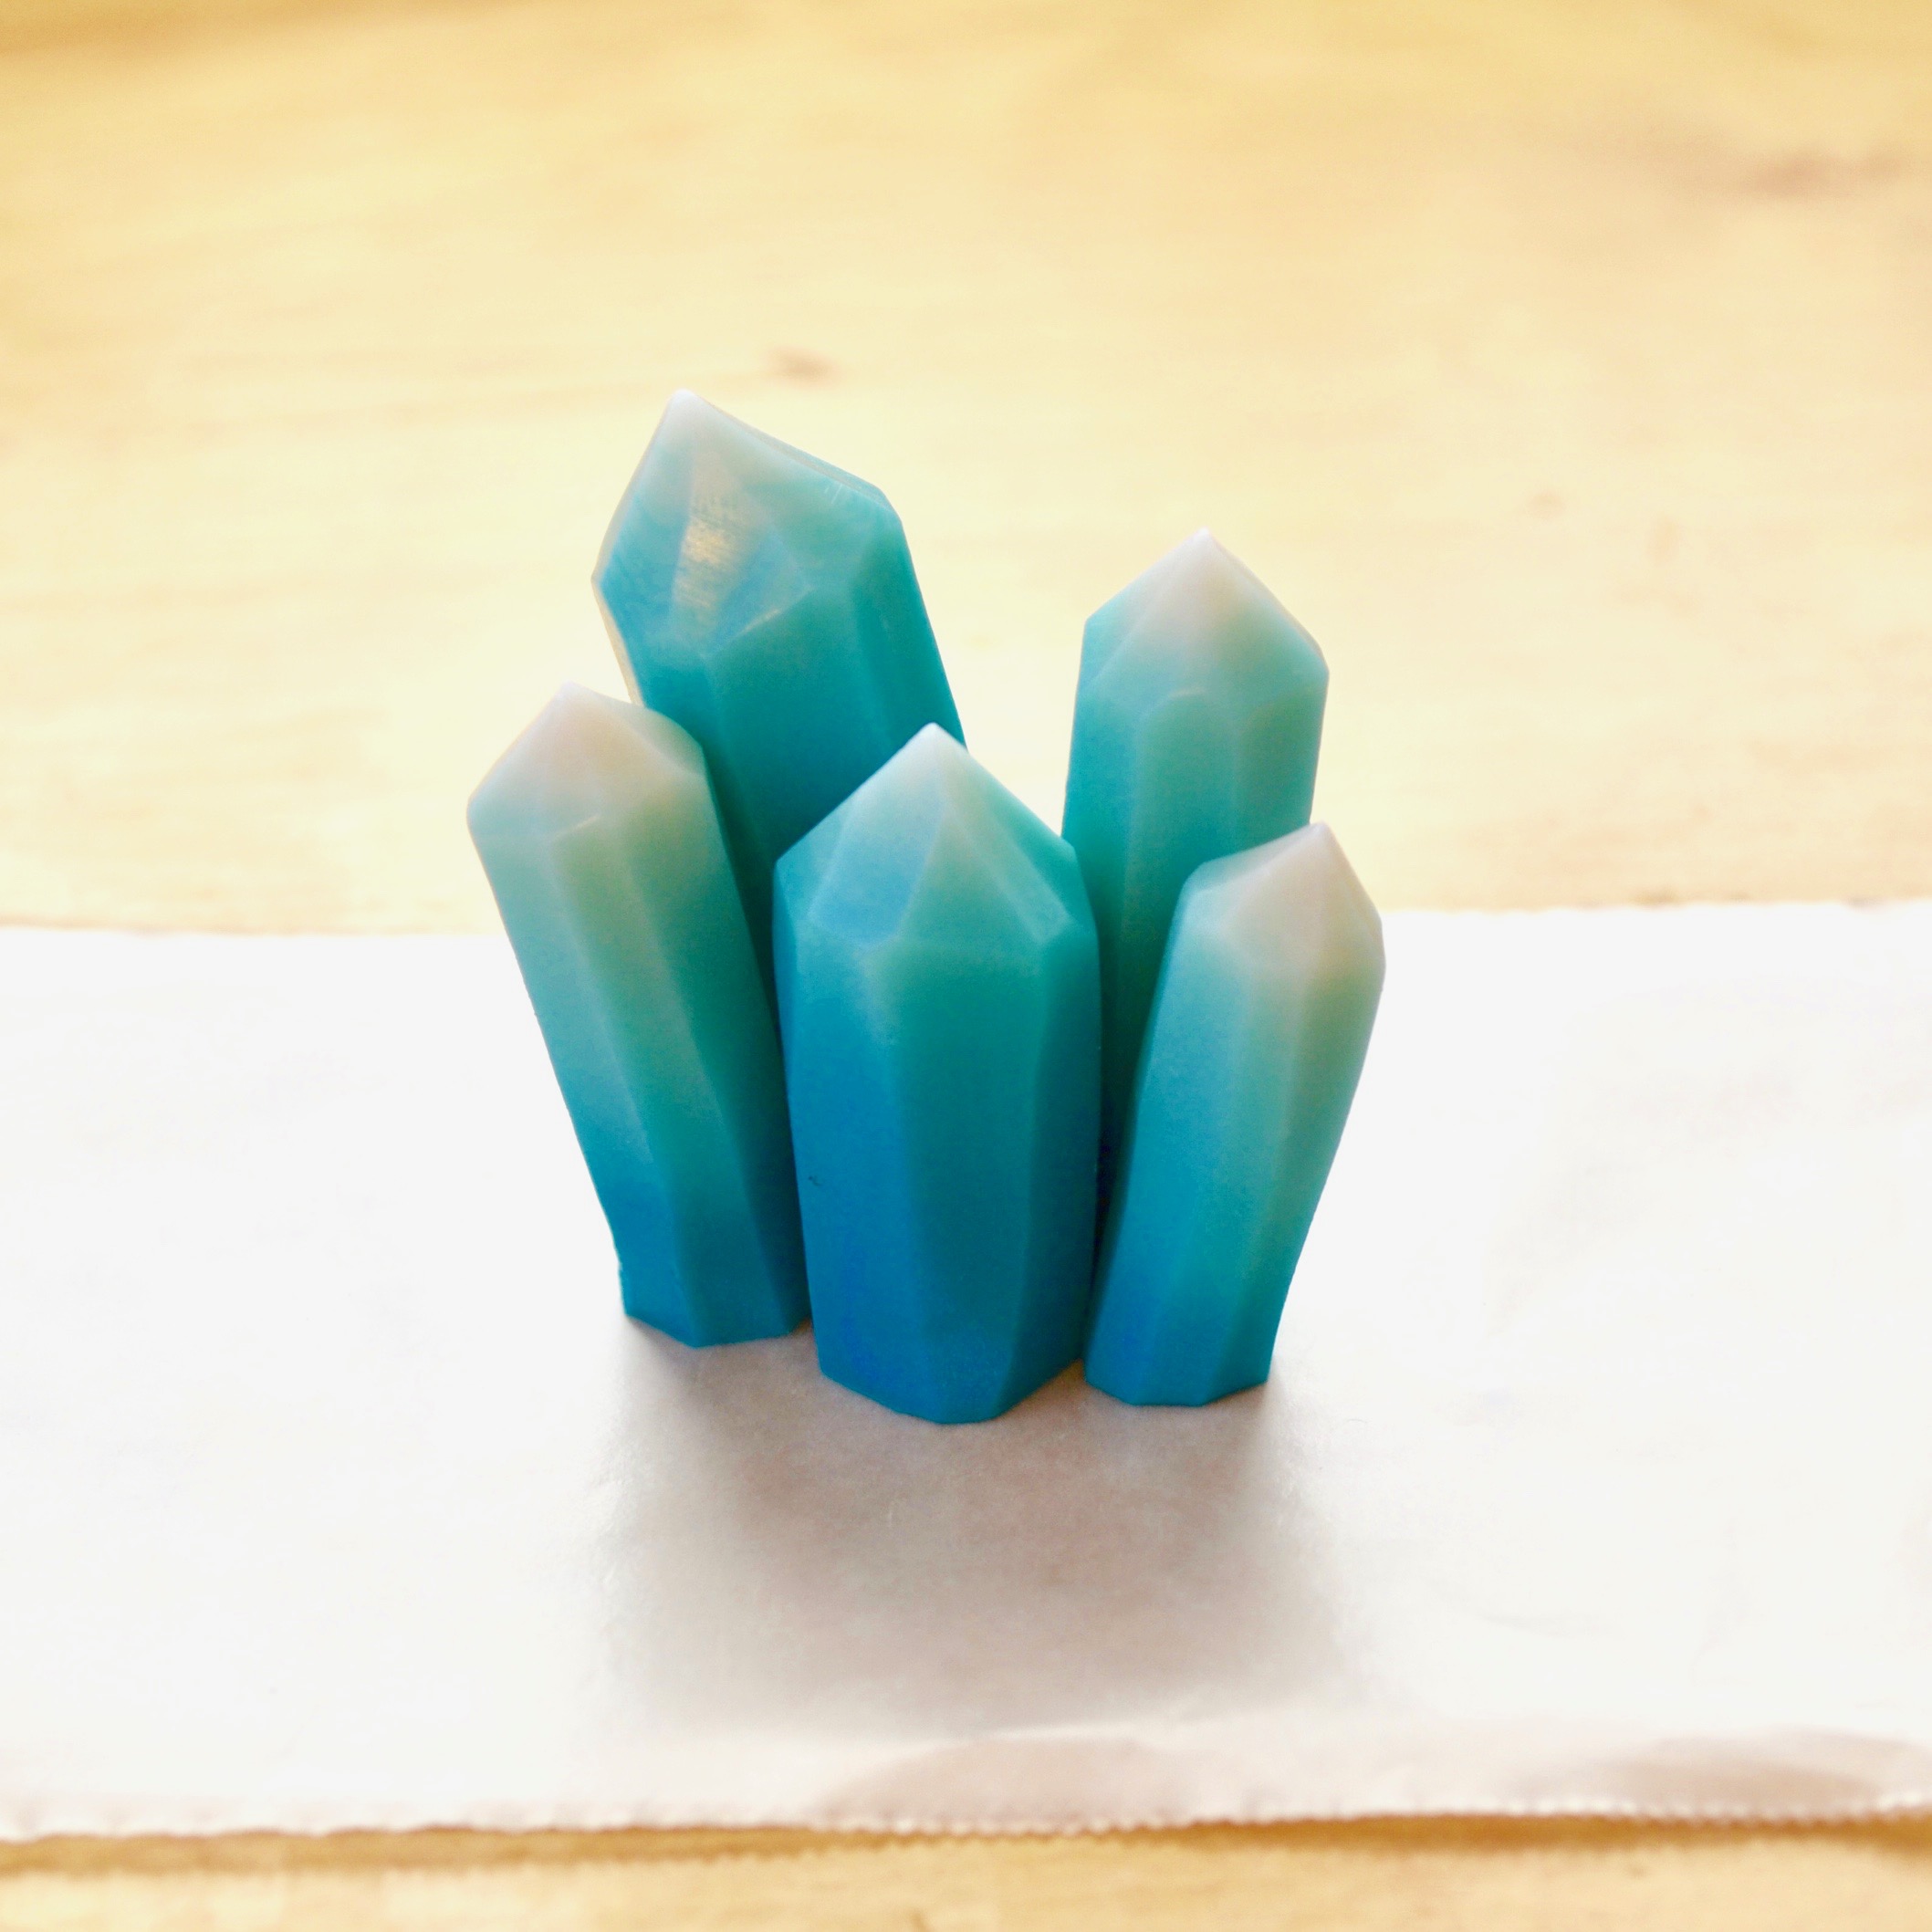
You should end up with a crystal that looks something like this.

Go ahead and make a good assortment of different sizes of crystals to work with (I made all of these, but only ended up using 2/3 of them).

Now we are going to put the crystals together into a cluster. Get a small piece of waxed paper on which to make your arrangement.
Start arranging the crystal points. You want the bottoms to sit flush with the wax paper. It you want a crystal to sit at an angle, cut the bottom at an angle as shown.

As you add the crystals gently push them together in a cluster.

Continue to add to your cluster, mixing sizes, and adding crystals at skewed angles if desired.

When you are happy with the main elements of your crystal, we will move onto making the rock base. Here I am using Sculpey Souffle- ½ block of Concrete and ¼ block Latte. Blend the two colors. Roll into a ball, then roll ball into about a ¼” pancake.
(Sculpey Souffle is a formulation designed to work well in thick clay pieces. Ordinary polymer clay has a tendancy to crack after baking if the piece it too thick. Also Souffle has a matte texture to it which I think works well for stone.)

This step is optional, but I think it is probably a good idea. Take Translucent Liquid Sculpey (TLS) and smear a thin layer on the pancake. This will act as a “glue” between the crystal and the rock base. They will stick without it, though, so it is not entirely necessary.

Gently lift your crystal cluster and peel away the waxed paper. Place it in the center of your rock pancake.

Take the ombre crystal shavings that you set aside and roughly chop them up. We will be using them as smaller crystals around the base of your cluster.

Add small crystals around the base to your liking. Gently push onto the piece.


Remove the excess clay on the rock base.

Take the rock base scraps and roughly chop them.

Take the chopped “rock” and add to the base of the crystal. Shape the “rock” to your liking.


Bake your crystal according the instructions on your clay’s package. For my piece, I baked it for 1 hour at 275ºF. Let cool completely.

To add a nice shine to your crystal, apply 2 coats of Sculpey Gloss Glaze to just the crystals, not the rock.

Congratulations! I hope your crystals are super adorable and that you love them!


This is incredible. Great tutorial!
LikeLike
Thank you so much Denice! Your comment put a huge smile on my face!!!
LikeLike
This is nice and realistic! Thank you!
LikeLike
Great tutorial!! Super easy to follow and it kept me interested the whole time! My project turned out amazing with your directions, much appreciated! I can’t wait to see what other tutorials you have created! I bookmarked your web site for lots of future use!
LikeLike
Thank you so much for the kind words. I’m so glad you were inspired to create!
LikeLike
superb ! Am motivated to make this. Thanks
LikeLike
I’m relatively new to polymer clay, but not to crafting & the art world. I really appreciate your well written tutorial with easy to follow pictures. I’m big into crystals, so this will be a lot of fun to make! Thanks so much!
LikeLike